|
USBDM-SWD
features:
Win 8.1 Installation instructions:
( For reference only, software version may be upgraded by the author from
time to time)
PGO has provided complete documentation on
each of his USBDMs.
http://usbdm.sourceforge.net/
Our USBDM-SWD is pre-programmed with PGO's
latest firmware version 4.12
for ARM controllers.
The installation is done
total automatically. You don't even have to connect the
USBDM.
The installation steps are as follows ( Do not plug in the USBDM-1 until
the step 3 ):
1. Click
http://sourceforge.net/projects/usbdm/, then
click the Download
The size of the file is
very large. It will take a few hours to download, so you should first save
it on your hard drive in case you need to install it in another PC
in the future.
2. After
download, click the installer,
USBDM_4_12_1_80_Win_A.msi, in the folder named
Downloads, the installation will be done
automatically.
3.
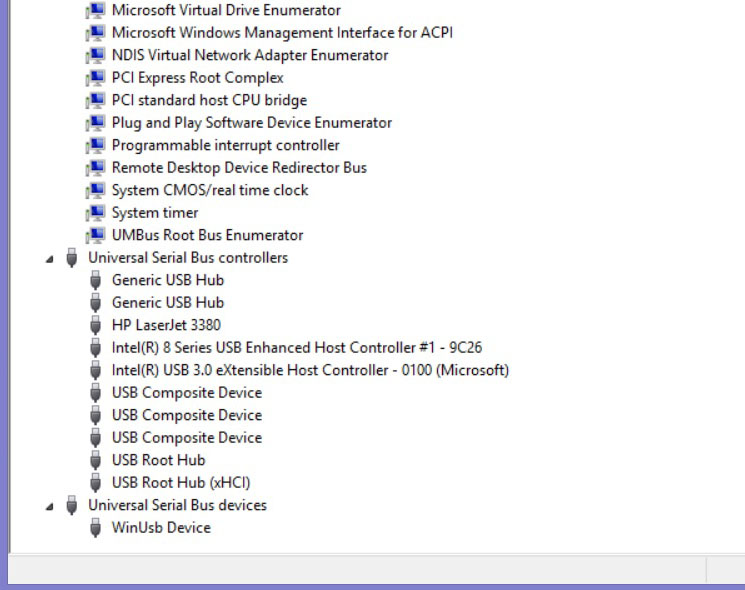
In the Device Manager, check the
Universal Serial Bus
devices, it should show
WinUsb Device. It won't be
shown as a virtual com port because it's not a USB
to RS232 adapter. See the picture below:

Operating instructions:
- Connect your USBDM-SWD to a PC USB port.
After one second, the green LED on the BDM should come on and stay on.
It indicates that the BDM firmware is installed in the MC9S08JS16.
- Set the target voltage selecting shunt
plug on J2 for the correct target voltage for 3.3V. Be careful not to
set at 5V for a 3.3V target board.
Our USBDM-SWD includes a voltage monitoring circuit. If the
target voltage is 5V, a red LED will be on, if the target voltage is
3.3V, a yellow LED will be on. If the target voltage is 4V both LEDs
will be on.
- Connect the 2x5 0.05" pitch BDM cable from the BDM
OUT to your target board.
|
 Trainer4Edu.com